I have been collecting ever more broken products to recycle. Since we didn't get but one bike at the Fix-It Clinic this past weekend I ended up taking apart a Dyson vacuum there. Below I'll detail that and some of the other items I've been pulling apart. Some have been great, some have been horrible. Some have helped me learn how to efficiently disassemble products.
First up, the
Dyson. I didn't get photos of this one during disassembly, but partial disassembly took approximately 2 to 3 hours. All the fasteners were hidden, and half of them were just plastic clips. This made it immensely difficult to just get the thing apart. And even when it was apart I found that the big yellow ball was a two-shot mold, which means one material was injected directly into the other, making them inextricable.
Additionally, one large portion of the main frame was created with two different types of plastic glued together. not usable. Actually, none of the yellow plastic was labeled for recycling either. Horrible.
The
Eureka Maxima vacuum offered me a few parts including the red ABS head, but I didn't get to take that one apart. I believe the
unknown black vacuum was the one that had a WOODEN brush roll. High five for natural materials!
The
LG Model LUV300B vacuum was a treat to work on. Every bolt was easily accessible and changing a belt or even the broken motor would have been a 15 minute job. Unfortunately I got it partially disassembled, so I finished the job.
You can see the brush motor here, held in by two or three bolts. The head cover was extremely easy to take off. There were very few plastic clips; almost everything was bolted in with Phillips head screws. The motors were large compared to the other vacuums I've taken apart. A well-made unit for sure, and probably easy to fix. Almost all the plastic pieces were marked for recycling, most being ABS or PP.
The
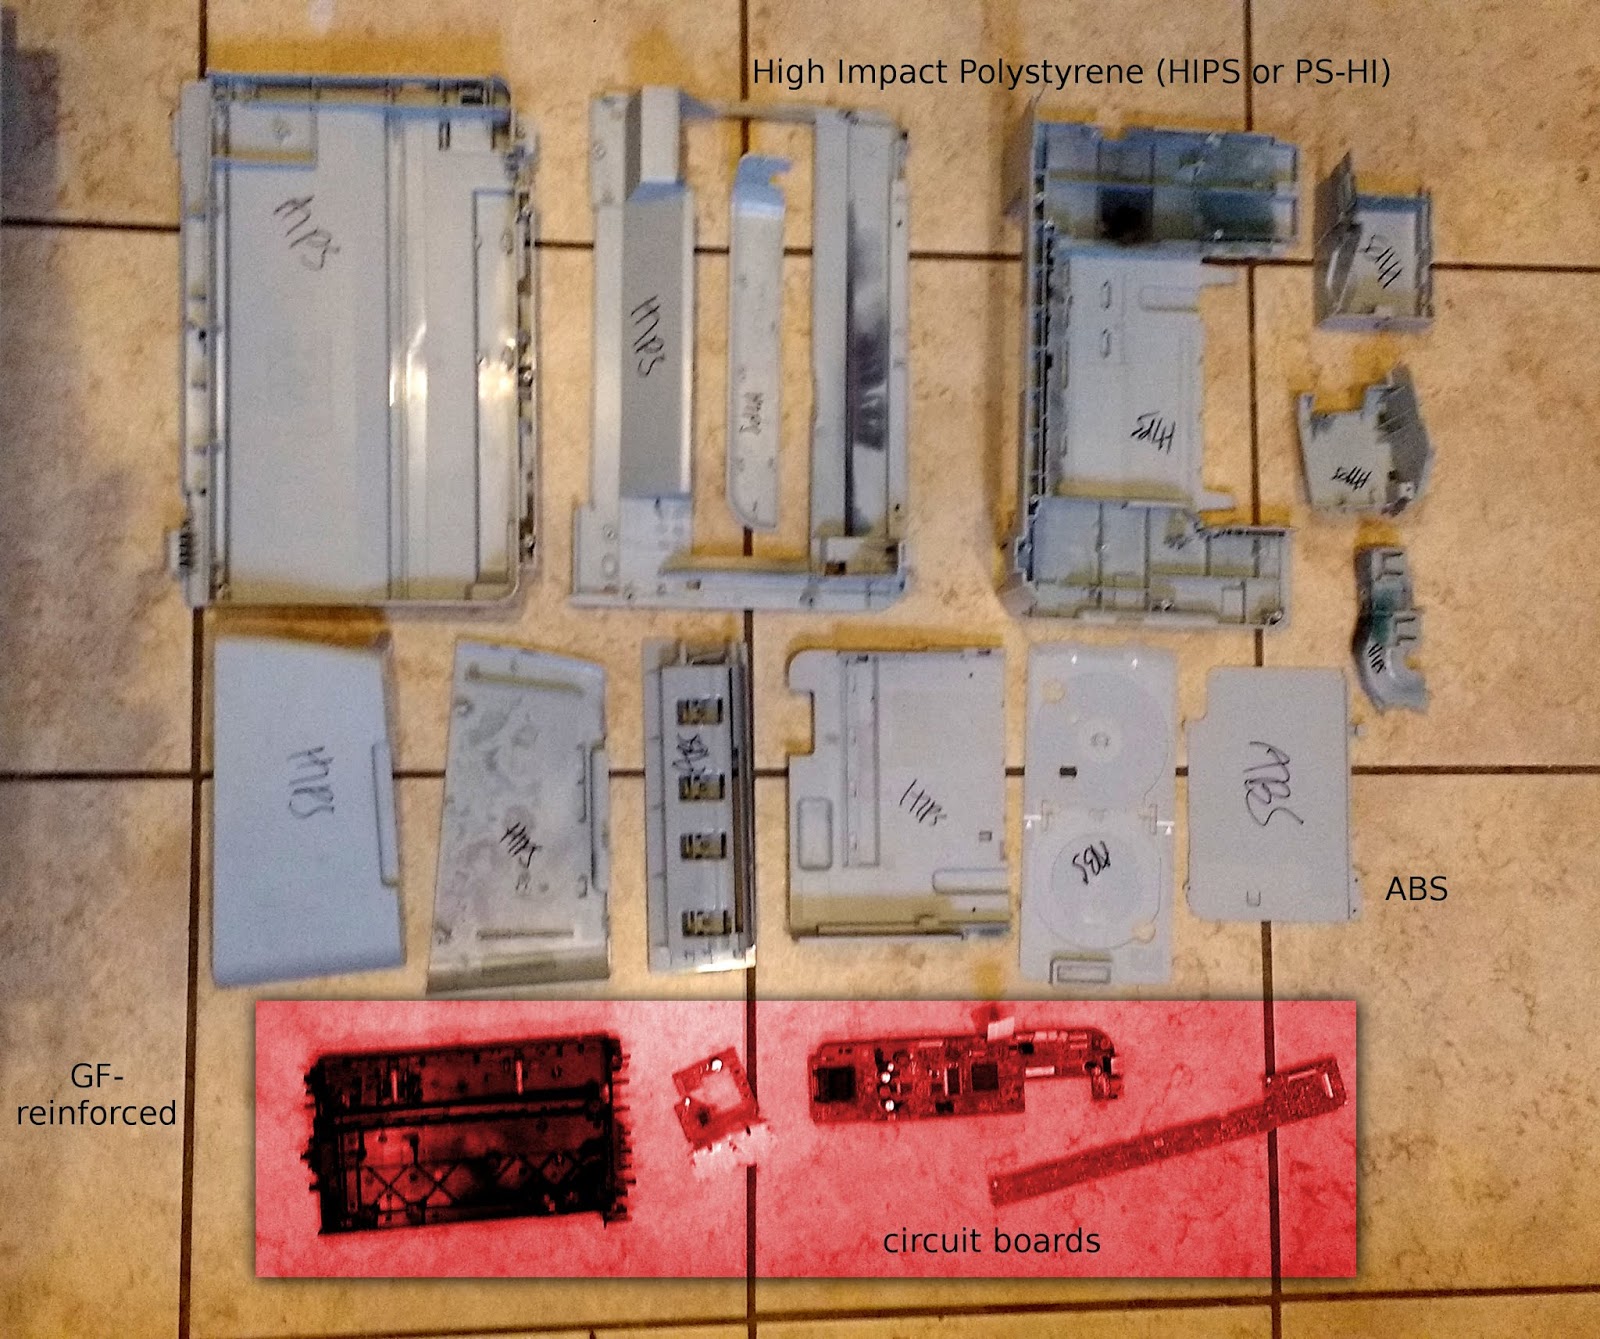
HP Photosmart C5200 Printer lent a good amount of usable High-Impact Polystyrene (HIPS), some ABS, a little metal, and not much else. I will have to find a way to get rid of a few circuit boards from it too, of course.
This one started out looking promising. The entire outer shell was made of usable thermoplastics. I pulled the glass out of the scanner to hopefully use in a custom picture frame later- the third I've collected so far. But once I got into the printer things got grim.
The printer was very well-built with lots of metal, but part of the high build quality was also due to HP's liberal use of glass-reinforced ABS and polycarbonate (PC). Everything inside seemed to be made of the stuff, which is not recyclable as far as I'm concerned. Maybe someone could do it, but I'm not going to attempt it.
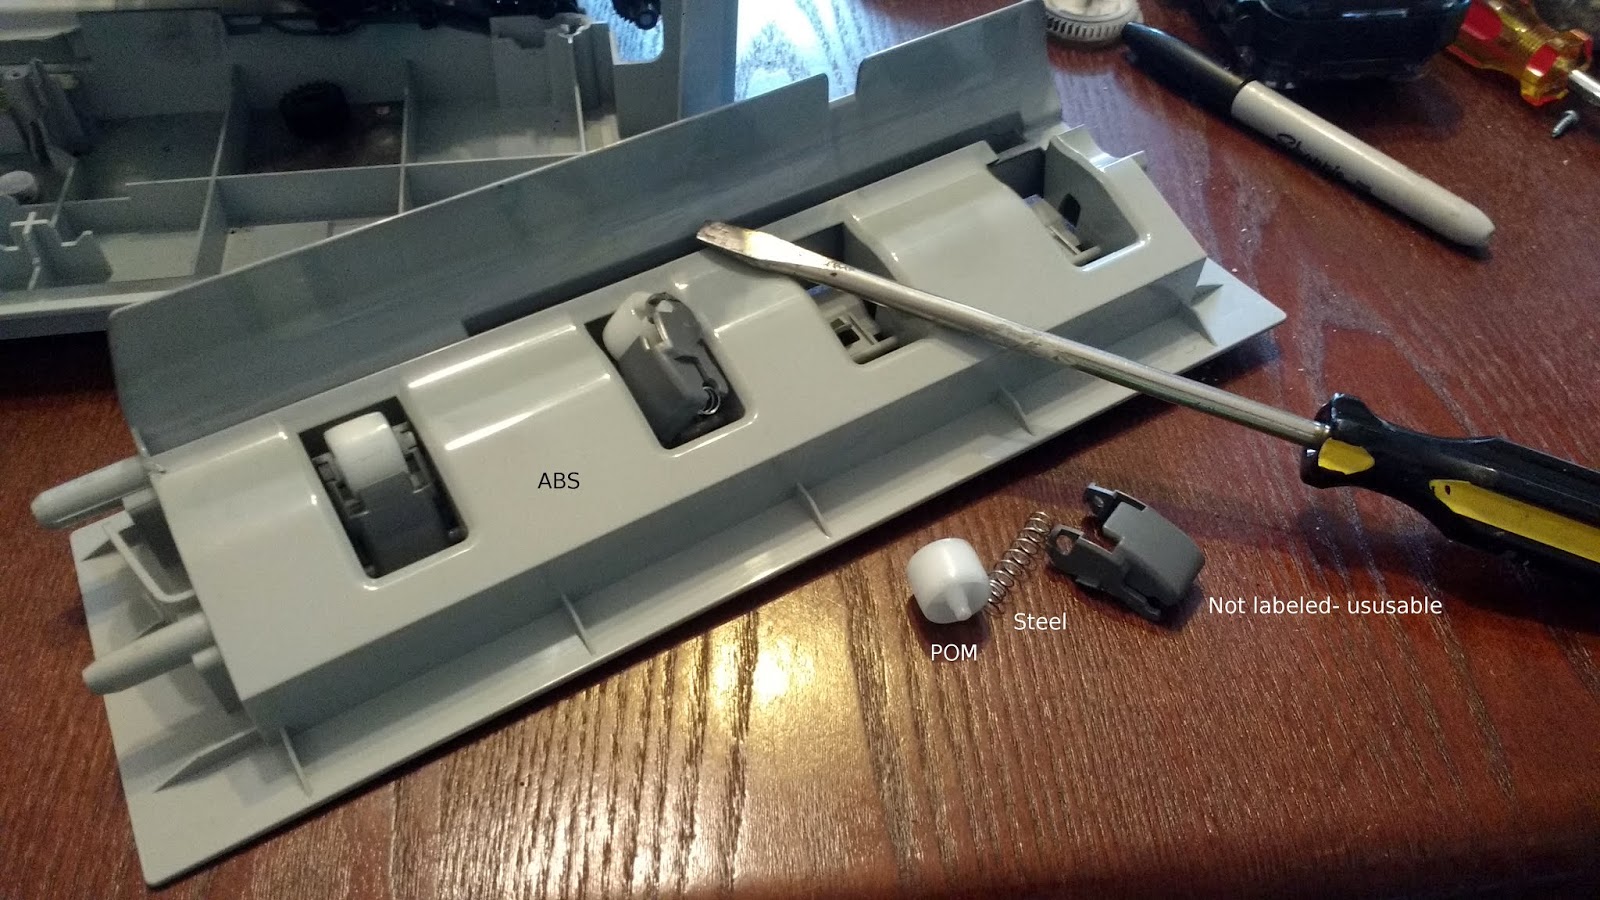
A few pieces were usable though. Here we have some POM rollers held by steel screws and unrecyclable roller carriers. The whole grey piece there is ABS as well. Below is a photo of all the larger usable pieces along with a small sample of the stuff I can't deal with, in red. I've gotten into a habit of marking things with a Sharpie to keep them straight.
Is it better to have a longer-lasting product which is less recyclable, or a more disposable product which has a higher percentage of its parts made of easily recycled stuff? I feel as if there may be a middle ground at the expense of size and weight.
Next is one product that someone from Facebook dropped off. I've gone through several vacuums from FB so far, but this the most annoying. It's a
Shark brand vac. Everything is put together with either
security torx screws, glue, or some form of two-shot molding. Several parts had paint or chrome plating which needs to be removed before recycling. Some parts were not labeled for recycling.
Below is the top of the canister, disassembled. You can see that out of six parts in this assembly, only three are directly recyclable as-is. I could try to strip the chrome off with oven cleaner as diecast car customizers do, but it's probably not worth the tiny piece of ABS.
Next, the canister itself. Only a small fraction of the material is actually usable.
Close-up of the screen. This had to be removed from the canister by use of a steel punch, a long piece of scrap metal, and a hammer. Anyway, the plastic was molded around the steel screen, making this piece unusable.
Here's the vacuum head with its GLUED-ON lighting windows.
No, you can't peel them off.
Wire cutter time.
Last was a Panasonic cordless land line phone from a Facebook person. I think I got more usable plastic parts off this little thing than I did the entire Dyson vacuum.
This glue might not come off without some work, though. Unfortunately construction like this greatly limits the item's disposal options.
Here is the e-waste. Quite a lot for such a small product.
That's all the deconstruction I have for now. Stay tuned!