Wednesday, April 24, 2019

Clipboard Prototype & Mixing HDPE Sources


I found that chrome clip on the side of the road as part of a water damaged cardboard clipboard. It was unusable as-is so I decided to give it a new life with some plastic. This time I wanted to do something fun looking as opposed to the standard green, so I shredded up some black can carriers and white yogurt cup tops.


Of course it's all #2 HDPE, but I found that the black can carriers didn't really melt along with the others. They must have some additive, probably a stiffener, that makes them melt at a higher temp. The white yogurt top pieces did fine.

 I also got to use one of my brass stamps sold by Precious Plastic itself, but since the letters are really small I also stamped in a "2" with my Harbor Freight stamp set to mark it as #2. Involving a torch and some patience, this is not a terribly quick process. However until I get a fancy mold with inserts, it's the best I've got.

Saturday, April 20, 2019

Earth Day!


Fran and I were happy to table with The Azulita Project at Flagstaff's 2019 Earth Day at Bushmaster Park! Here we are posing with Vice Mayor Adam Shimoni right before loading the machines back into the truck. It wasn't as hot as last year but we still both got sunburns!


Thanks to Mia Trujillo from the next table for taking our photo!

I will update this space if I can find any more publications with pictures of our table.

Climbing Holds Part 2: Finishing the Casting


  We left off on Step 5, packing sand into the casting box. I came back a different day to finish.


Step 6: Gently remove the pipe from the fill hole. Pick up the upper half of the box and flip it over.


Step 7: Inspect the clay. We can see here that they jeep's tire fell apart on disassembly. It turns out there is a small undercut in the plaster mold which caught the clay and ripped it apart.


Step 7b: I did extensively trim the jeep mold in hopes the draft angles would work out, then repacked the second box. But because I missed that undercut the second one didn't work either. I decided to scrap plans for the jeep in the first round so I could at least get one out.


Step 8: Remove the plaster pieces and reassemble the box. Melt scrap aluminum in a foundry (I used Northern Arizona University's foundry) and pour it into the feed hole (bottom). The metal will bubble up through the vent hole (top) and then you know it's ready. Let it cool for at least a half hour.


Step 9: After the exposed aluminum is cool enough to touch, start digging the sand out. Remember that the aluminum will be HOT inside the sand, so avoid touching it below the very top 1/4"/5mm. After you've removed the sand on top, use foundry tongs to remove the casting from its box.


Step 10: Clean the sand out of the casting and break or saw off the feed tube and vent tube. Throw any aluminum waste back into the scrap pile for the next casting. Below is a photo of the other side. I was thankfully able to make the edges thicker by scraping out some sand in step 7. This will give me a little heavier-duty mold with more material to work with.


Next steps: I will use the angle grinder to clean up this casting's backside and make a good shelf for bolts to go through. Then I'm going to put the front side on a belt sander to make it nice and smooth. The flat side there has to mate up to a steel plate, so I'm guessing the smoother it is, the better the molding process will go. Stay tuned!

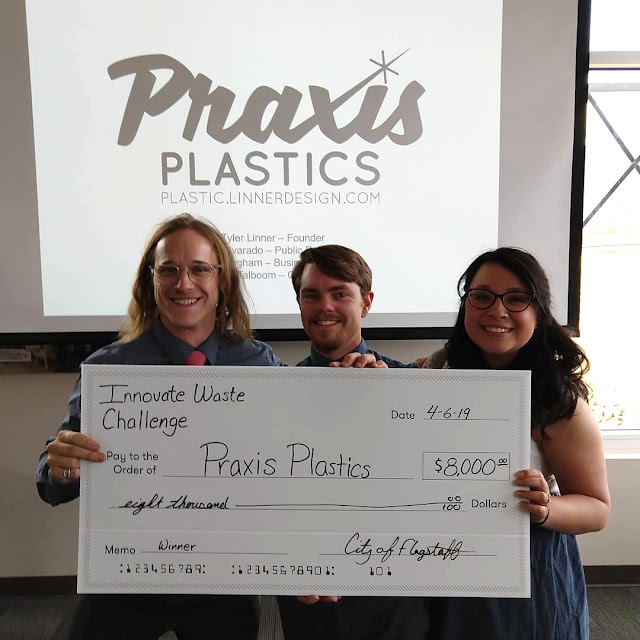
Innovate Waste Challenge Winner!


Praxis Plastics, as a team of me (Tyler Linner) as founder, Darren Bingham as business outreach coordinator, and Fran Alvarado as public relations coordinator, are ecstatic to announce that we've won $8,000 through the City of Flagstaff and NACET's Innovate Waste Challenge.
 

To get this support of our city and its business incubator partner, we were invited to many "launch and learn" seminars since last fall, submitted a written proposal including business plan, and finally 'pitched' the project to a panel of four judges.

Thankfully our plastic recycling business pitch won out over two competitors! We will be working closely with NACET (Flagstaff's business incubator space) going forward to tackle the transition from thesis project to local manufacturing business. NACET thankfully offers incubator workspaces for businesses, so we are looking at funding sources for that and other important factors.

Watch this space as we progress. I'm aiming to grow this into a major producer of plastic items for Northern Arizona! It's a tall order but a lot of people are rooting for us. For instance, we plan to use the Innovate Waste funding to acquire an industrial-scale shredder and injection molder so that we can dramatically up our productivity and offer competitive prices. We are talking with other local businesses to secure both clean plastic waste streams and to find a workable product idea that we can jump into production with as soon as possible.

Thursday, April 11, 2019

Climbing Holds Part 2: Preparing For Sand Casting

Sand Casting is a complex process for someone like me (and likely you) who has never done it before. Here's the quick rundown.


1. Remember those plaster casts of the clay parts? Flip those upside down on a board and put the bottom half of the sand box (called a flask? I'll call it a box) upside down as well. Sprinkle it liberally with baby powder as a mold release.


2. Pack foundry sand/casting sand in, about an inch in depth at a time. Push it down with your fingers and then pack it in with a small tamper. All the air holes need to be gone. Keep packing sand until it's up to the top, then level it.


3. Flip this half of the box upside down. We can see the sand is packed tightly enough that it stays in place and the female side of each plaster mold is visible and upright.


4. Stack on the second half of the box and dust liberally with baby powder again. This is a good time to plan where you will pour the aluminum. To make the pour hole I put the pipe end of a crude hammer down. In a later step we will make channels to feed the two parts. Later we will also make vent holes.


5. With the pour/feed hole set in, pack the sand in, being careful to completely fill the plaster molds. Keep packing layer by layer until this one too is level. Now the entire box is filled with packed sand- almost 100 pounds (45 kg) of it! In the middle of course are the two plaster molds ensconced in baby powder, with a thin layer of baby powder also separating both boxes of sand.

Next Steps: I write this on Thursday. On Monday I will be pulling these apart, punching in vent holes, adding feed runners between the parts, refining the feed hole, and (with luck on my side) pouring aluminum! After that I'll be packing the other box with three other plaster molds. I'm hoping that I will be able to pour at about 9am, remove the sand, pack it into the second box, and pour again before leaving around 3pm. At that point I could walk home and do any finish work on the aluminum using a Dremel and other tools. Wish me luck!

Shredder Bracing & Some HIPS Flakes!


I noticed that the elastomer in my Lovejoy coupler kept shredding itself apart, and at $30 each I do not want to keep buying them every couple work days. It appeared that it was getting damaged when binding up, and that the motor/gearbox assembly was leaning itself away from the shredder, and actually bending the table top in doing so. The little 2x4 braces on the edges helped, but I needed a heavy duty solution.

So I built an upper frame to triangulate the top of the motor with the rest of the table. This makes working with the shredder (and clearing jams) more difficult, but so far it's helping the elastomer last longer because the motor can't move as much in relation to the shredder or the table.


In happy news, I've shredded very nearly all of my stockpiled HIPS (High Impact PolyStyrene) printer parts! This is probably 4 gallons of the 5 gallon bucket, and it's multi-colored black, grey, and white. I'm excited to make some sheets out of it ASAP.

New Machines! Injection Molder and Extruder.


After a few missed shipments of the machines from Precious Plastic USA (not PPUSA's fault) I decided it would be easier to 'simply' drive down to Phoenix to pick them up myself. But my truck is broken for now, until I have time this summer to fix certain important things. So I borrowed my roommate's Ranger to make the drive down 5900' (1800m) in elevation and then back up. It ended up working alright and we made it back to Flagstaff with both machines for about $45 in fuel.


The injection molder mounts on the wall, with its frame built to line up with 16" spaced wall studs for easy mounting. You can see the control board is made from recycled plastic- cool! The giant lever is what you use to inject the plastic. For storage it locks straight up. I calculated that this machine can probably inject about 27 cubic inches (442 cc) of plastic based on its piston travel.


The extruder has its own modular table. You can see the motor and small gearbox on the right.

I have not had the chance to try out either of these yet, unfortunately. But the climbing holds will be made with the injection molder.

Climbing Holds Part 1: Sculpting & Plastering


Regular readers may remember that I'm getting independent study credit to work with a local sporting goods store, Snow Mountain River, to create climbing holds out of recycled sleds.

A few weeks ago I enlisted the help of some friends and their friends to sculpt these climbing holds out of clay. We ended up with over 15 different holds, which had to dry overnight.


Next step was to mix up some plaster of Paris to slather all over the dry holds. The plaster then had to dry. Pro tip: put down aluminum foil before you sculpt and again before you plaster; it'll make removal easier.

Also, mix the first layer of plaster with more water than you think it needs. You want it to get into all the cracks and you definitely don't want air bubbles. The other layers can be a little thicker if necessary, but make sure that first one is almost watery!

The plaster will likely feel cold as it sets and the moisture evaporates out. You will also see the edges of the clay looking dark before everything is dry. Give it at least 24hrs to be sure. Then flip them over. If you can get the clay out by gentle means, go for it. I found it was stuck in there pretty well, so I tapped on a flathead screwdriver like a tiny, gentle jackhammer for hours to get all these things out. It destroyed the clay. Be very careful to chip away from the plaster as you chip, and only get small pieces at once. It's easy to chip your plaster.

Watch this space for the next part.